
At Bensonwood, we combine traditional craftsmanship with cutting-edge technology to create modern prefab homes that will serve generations to come. Bensonwood’s engineering follows a sustainable approach to building technology, leveraging 3D modeling and CNC fabrication to reduce waste while improving accuracy and precision. We design our buildings with the future in mind to allow easy upgrades or replacements as technology advances.
Our buildings employ 3D programs before they reach the shop floor in what we call the “Digital Twin.” The 3D model uses individual panels in machine files that our CNC machines can read. This process leads to as much of an error-free building process as possible, eliminating many downfalls of traditional building practices.
We strive to constantly elevate the standard of building, making the process better for everyone involved. With strict quality control procedures in place, each panel has a QC checklist that travels and monitors dozens of parameters.
Initial Lumber Preparation
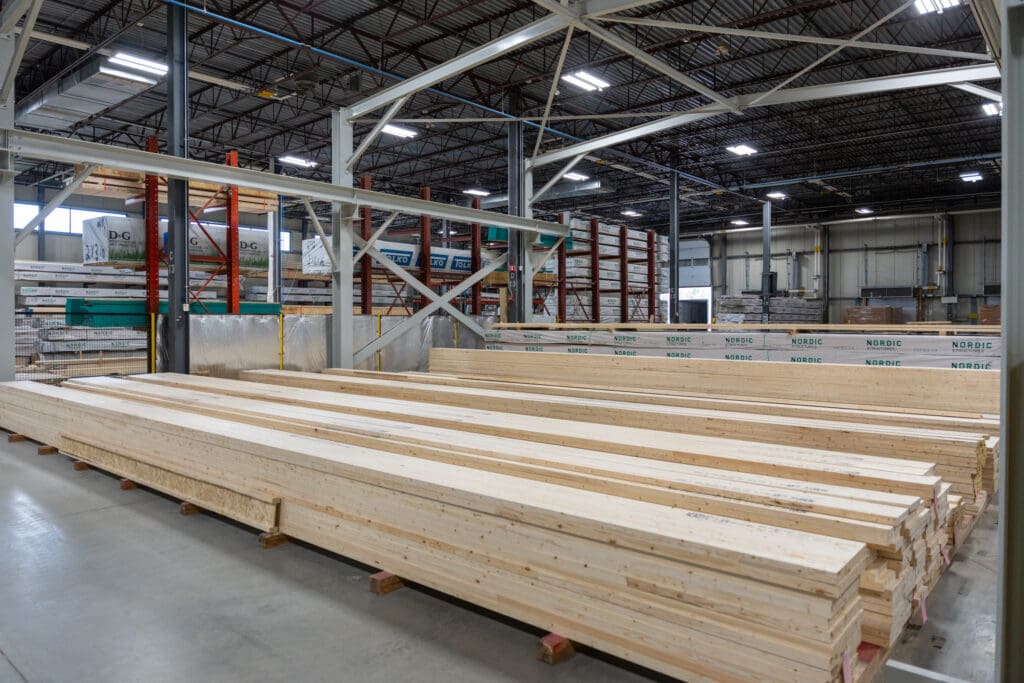
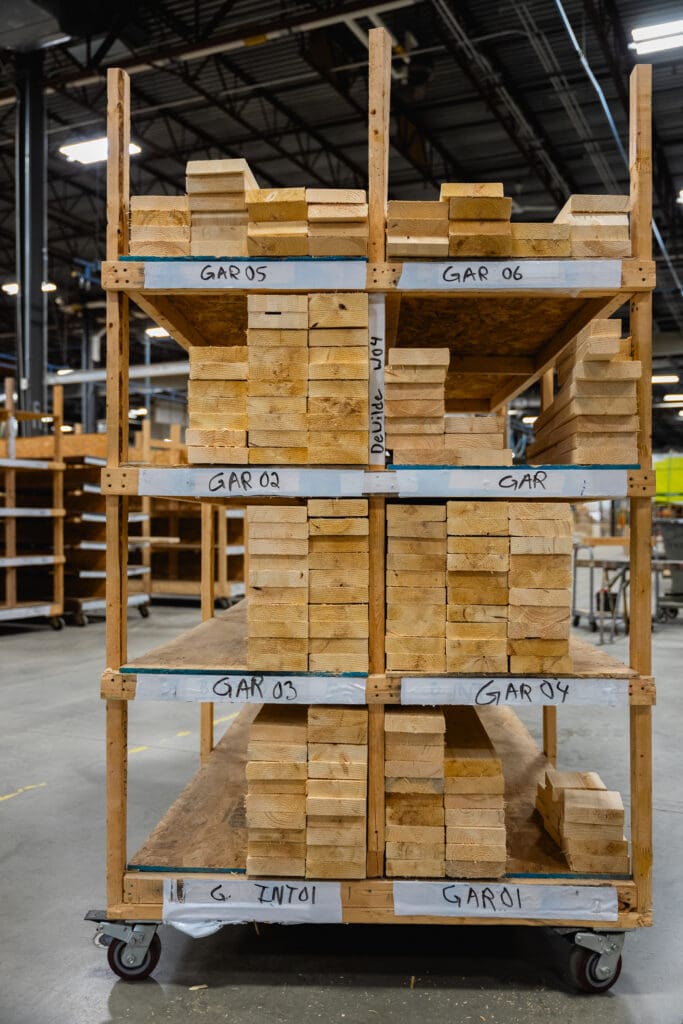
Regardless of the final application, all our panels start in the shop as simple raw lumber. Our lumber stays indoors at our facility, protected from the elements, ensuring our pieces stay straight and dry. As seen in the photos below, our lumber is incredibly long. This extra length is the result of a manufactured wood product from Nordic. Its origins are in the heartwood of rapidly growing black spruce trees. The smaller selections of wood combine into a finger-jointed glulam product, which is very straight and highly durable.
These engineered lumber products are highly sustainable and help improve waste efficiency when building modern prefab homes.
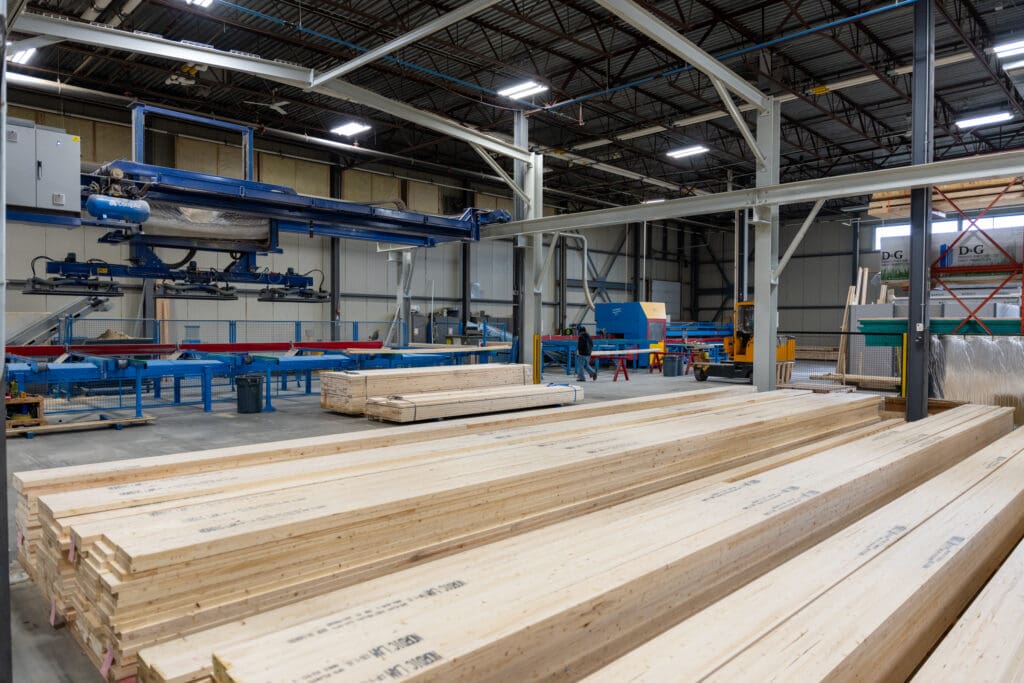
Lumber in an active project stacks by size and type in a bay accessible by our vacuum robot lift. The robot uses information on which kinds of wood are necessary. This machine automatically selects lumber from our bay and moves it to our Hundegger Speed Cut machine. The Speed Cut is multifunctional, able to cut, drill, mill, create notches, and more. This cutting allows us to create highly complex angles and connections with relative ease.
Step 1 – Cutting and Labeling the Lumber
The lumber is fed through the Speed Cut machine with information on the exact required dimensions. This information comes together on a computer in the digital twin. Each home we build is meticulously modeled in 3D, accounting for every piece of wood, screw, and every hole that needs to be drilled. This detailed information is converted into a machine file, which the Speed Cut interfaces with to assess how each piece of wood should be cut.
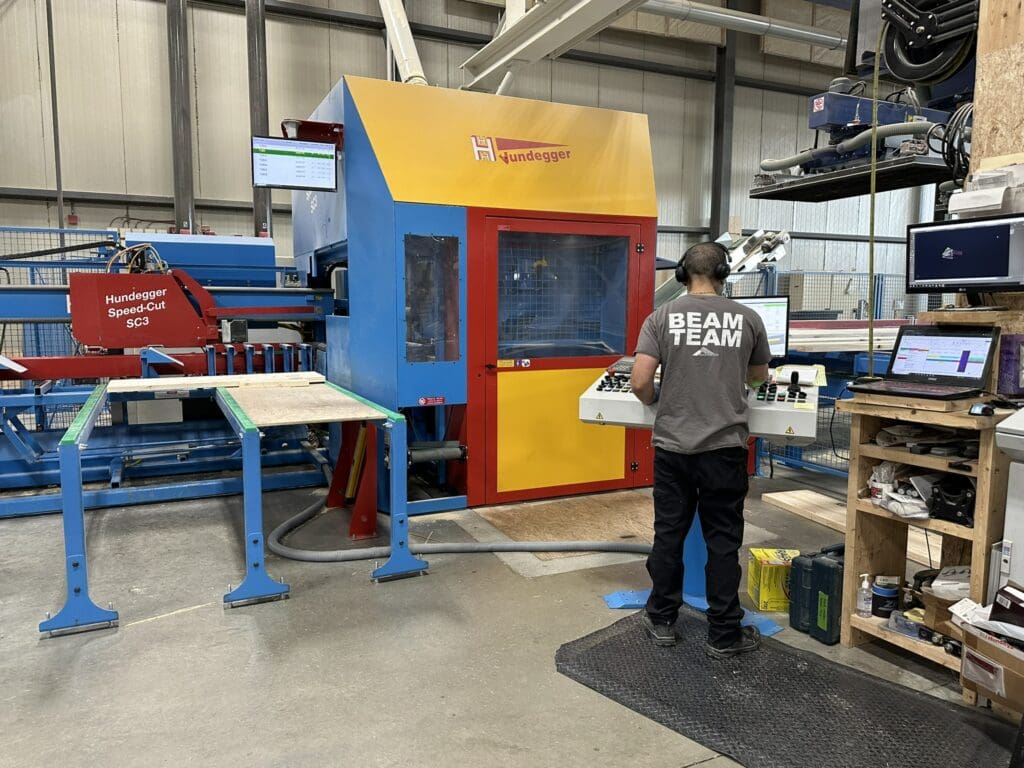
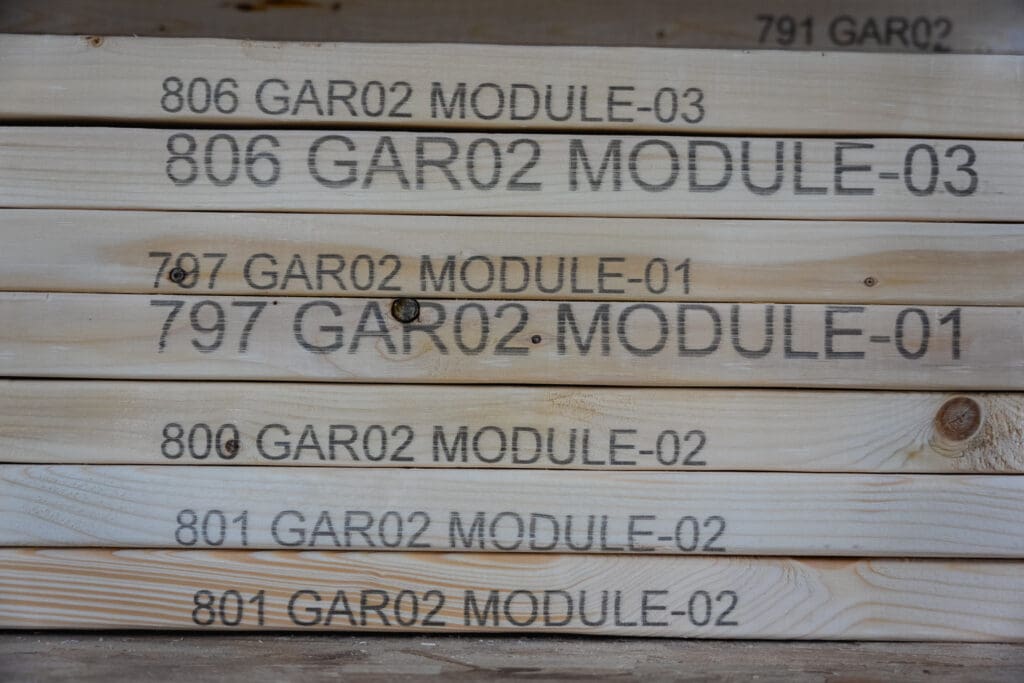
After the lumber is cut, it is automatically labeled with a unique identification number by an inkjet inside the Speed Cut. The labeling allows our building systems employees to easily find where each piece of wood belongs once they begin framing a panel. In addition to the identification markings, the Hundegger will also print layout marks, indicating where connections should be made. After cutting, each piece moves through a cart based on which panel corresponds to the appropriate modern prefab homes.
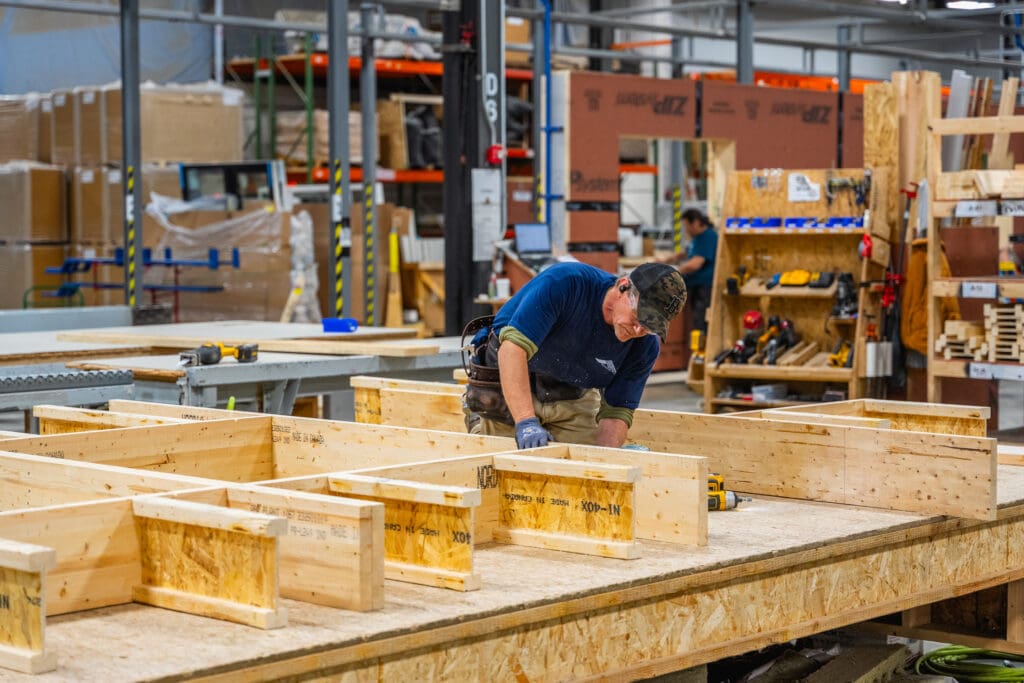
Step 2 – Panel Framing, Assembly, and Inspection
The wall panel is then framed by a combination of one of our skilled panel fabricators and our Weinmann Framing Machine. This process is aided by drawings accessible via an iPad at each station of the production line. Each iPad has a unique drawing available, relating only to the work being done at its respective station. This positioning keeps the process simple for the employees at that station, as they do not need to filter through excess information to find the instructions they are looking for.
Our framer will hand-build rough opening buildups before the Weinmann frames and extrude the rest of the panel. A worker will load material into the Weinmann. Then, using machine files from our Virtual Fabrication team, the machine will automatically align and space the wall studs to make up a completed panel. It will then automatically nail the top and bottom plates of the panel to the wall studs.

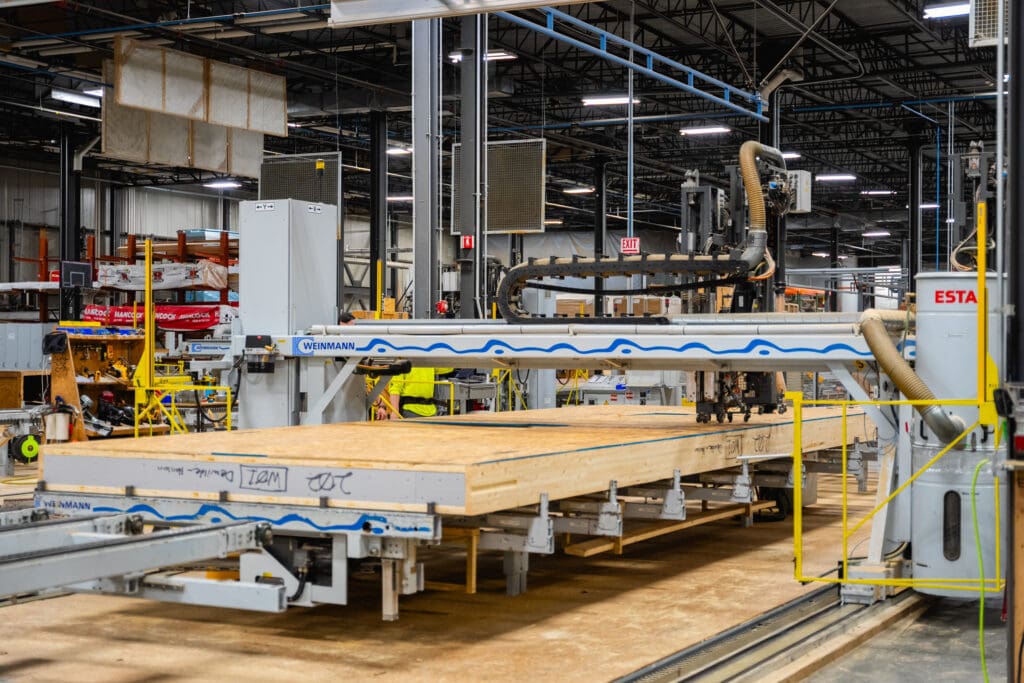
Step 3 – Multifunction Bridge
Once framing is complete, the interior layer of OSB lays on top of the panel. The OSB not only functions as the shear layer of our wall assembly, but also as a Vapor Control Layer. This layering results in a durable and robust wall for the life of our modern prefab homes.
With the OSB secure, the whole unit rolls into our Weinmann Multifunction Bridge. The Weinnman nails the OSB to the panel at all connection points, reading from our virtual fabrication team’s instructions. The connection points bridge together in a digital model so that the Weinnman can operate as necessary. After the machine completes nailing, it will also rout out any rough openings or required penetrations present in the panel.
It is during this step of the process that we also install our OB layer. This layer uses 2×3 framing that mirrors the length and height dimensions of the rest of the panel. These 2x3s are slotted by the CNC machine, which allows electrical and small water lines to be run immediately after our panelized structure is installed on-site at modern prefab homes. It also allows hold-downs and other engineering requirements to be completed on the warm side of the wall, eliminating the need to cut into the vapor control layer and insulated cavities.
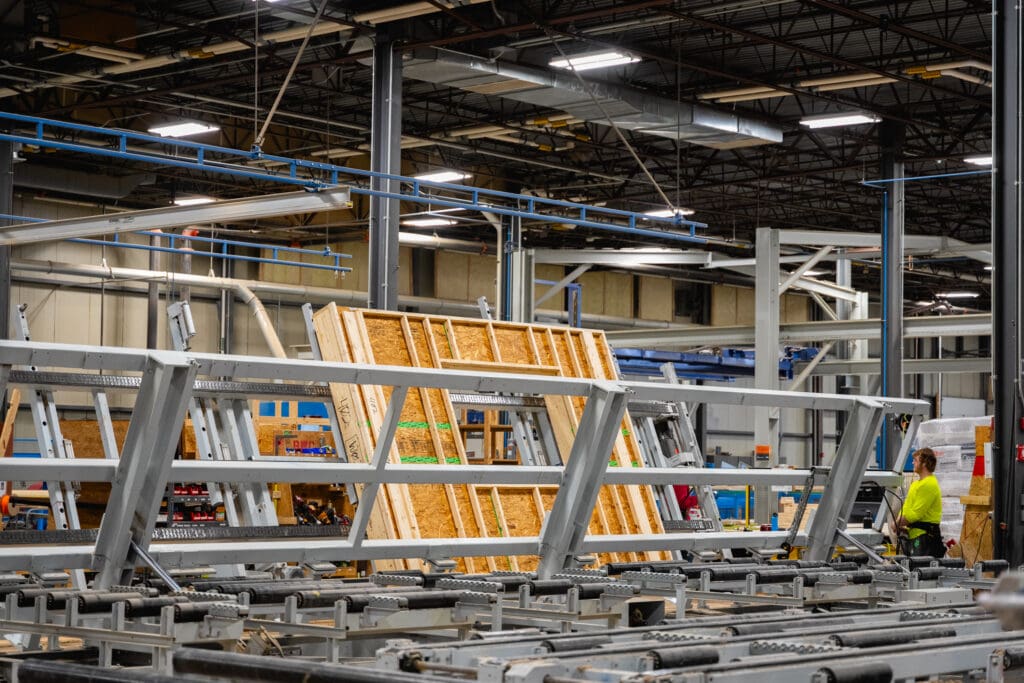
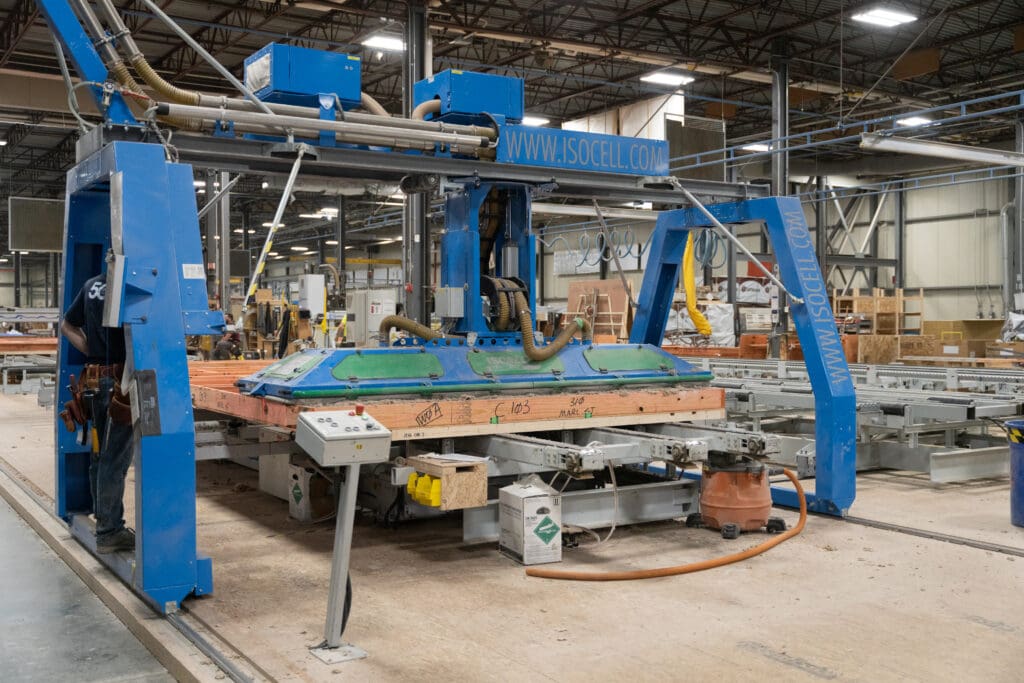
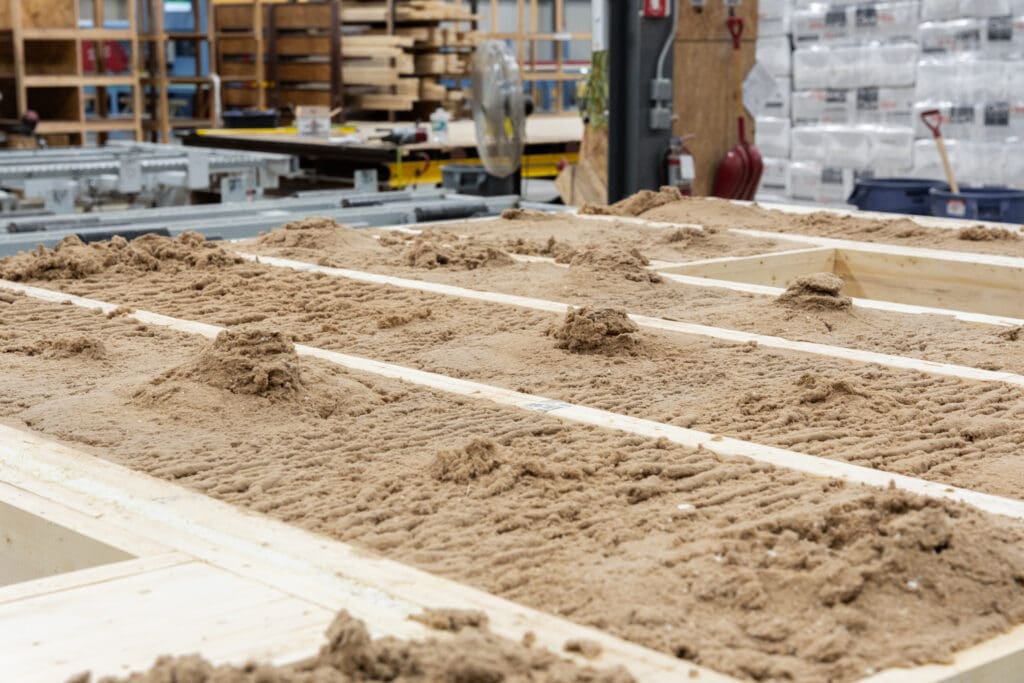
Step 4 – Factory Installed Insulation
After the back of the panel is in place, it will be flipped using another machine called the Butterfly Table. Because our wall panels can weigh up to 1,500 pounds at this step of the process, the use of this machine is imperative to the smooth operation of the production line. Once the panel flips and the open cavity is facing up, it is ready for insulation.
Our panels are insulated with dense pack cellulose, a recycled paper product made of reused cardboard. An Isocell Machine blows cellulose into the panel at a targeted density of 3.8 lbs/ft3. This insulation specification is standard across all Bensonwood wall panels. Insulating a panel at the horizontal orientation and such a high density ensures that the cellulose will not settle over time. We work hard to ensure the correct levels are met. A technician will regularly take a core sample of cellulose and measure its weight to verify density. This reading allows the technician to know whether the machine is operating as desired or if adjustments are needed.
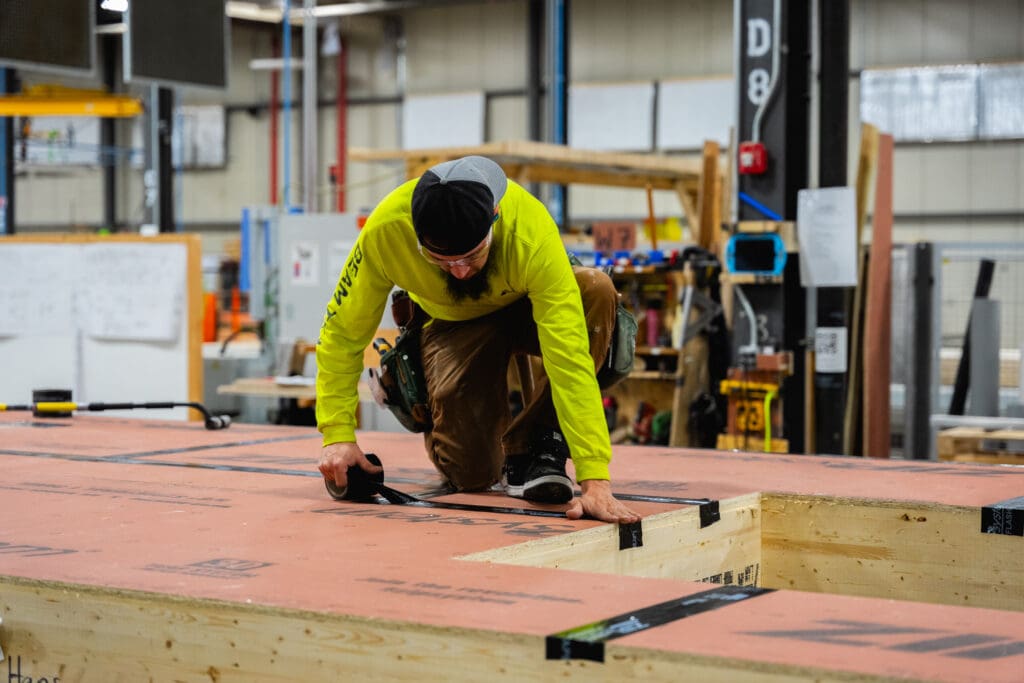
Step 5 – Sealing and Windows
After insulation, the panel will be closed with ZIP System Sheathing and moved to the next station in our production facility. A worker at this station will tape and roll every seam on the panel for our modern prefab homes, making sure there are no leaks or openings. Rolling the tape is an important step of our quality control process, ensuring maximum adhesion and air sealing. The taping also functions as a WRB or weather-resistant barrier. This protection helps keep rain and snow out of the seams between panels but also assists with wind resistance.
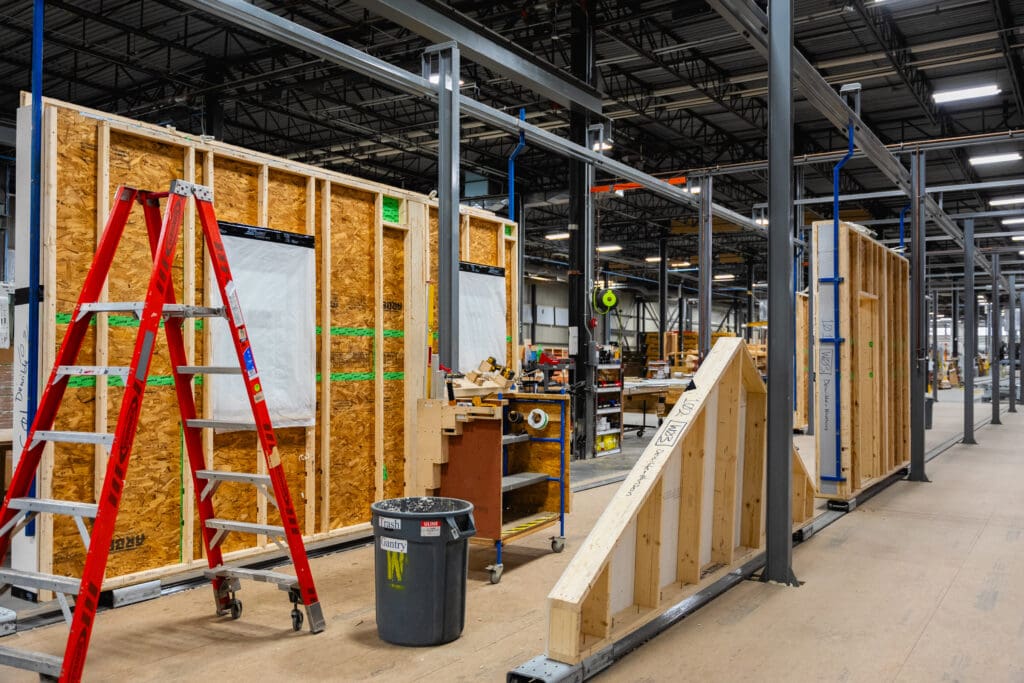
Step 6 – Internal Transport and Shipping Preparation
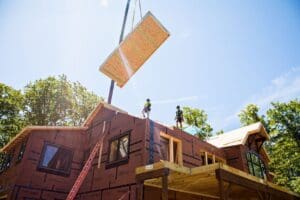
After taping, the panel transports down the line on automatic rollers to a machine called the upraiser table. This table lifts the panel into the vertical position and places it on a track. The panel is now ready for window installation by our expert crafting team. A major benefit to offsite construction for modern prefab homes is that windows and doors use a climate-controlled environment. This step introduces many benefits to the installation process. For starters, tapes and sealants are more effective when installed in a warmer climate. This sealing allows us to ensure proper installation all year long.
Our window installers are also able to take advantage of a vacuum lift that lives in our production facility. This vacuum lift does the heavy lifting, allowing associates to more easily guide windows into position without straining their bodies. Even for panels that will live on a second or third floor, the window installation happens at ground level. That way, the added factors of wind and precipitation do not hinder the process.

Step 7 – Preparation for Shipping
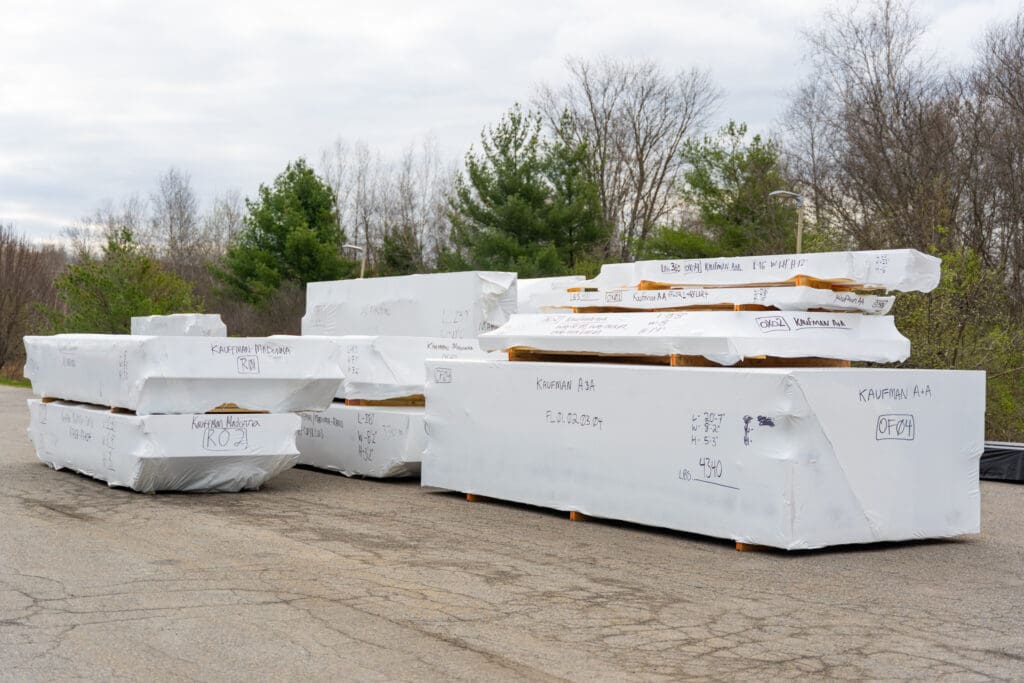
After window installation, the last step for these panels is “bundling.” Predetermined sets of panels join together following the order of construction for upcoming modern prefab homes. We assemble our panels by boarding up the windows and strapping them together in bundles. The bundles then use recycled boat wrap and storage until they ship out on-site. After unpacking, the boat wrap returns to our facility for additional recycling.
These bundles are compatible with road travel under most bridges and will not require a wide load designation. Once on-site, our team unwraps the panels for installation in a Bensonwood or Unity Homes shell.

Stunning High-Performance Homes That Last for Generations
The construction of our wall panels showcases a seamless blend of craftsmanship and technology. From careful selection and storage of materials to detailed 3D modeling and automated assembly processes, we ensure each panel is built to the highest quality. Bensonwood strives to set the standard for the future of modern prefab homes with efficiency and performance
We would love to chat with you about your next project. Contact us today to share your ideas or existing plans with a member of our team!
About Bensonwood
Bensonwood has been a leader in the rich tradition of New England timber framing for over 50 years. Our mission is to use our capabilities, capacity, and culture to expand the highest standard of sustainable living to a broader audience. We strive to produce consistent quality, a strong work ethic, and a spirit of inclusivity and teamwork. We believe in creating structures that stand the test of time and evolve to meet the changing needs of society.
Our diverse team, comprising experts in architecture, timber framing, engineering, and manufacturing, blends tradition with innovation to design and build homes that last. Bensonwood was founded by Tedd Benson, a pioneer in the revival of timber framing in America, who has led the company in pushing the boundaries of sustainable construction. Today, we continue to lead the industry, developing high-performance, energy-efficient homes that set the standard for sustainability.
Our state-of-the-art manufacturing facility in Keene, NH, has built projects across the U.S. and beyond. Bensonwood remains committed to making sustainable, high-quality building practices accessible to all.